Good Afternoon!
I found a tutorial for origami bow's
{Here} but as it was in Korean, I thought I would a) give it a go and then b) try and give you the steps in English.
I am a complete origami novice and it took me a few tries to get it right so don't give up!
Hopefully with my instructions I have cleared up where I went wrong so you won't make the same mistakes.
Grab some origami paper (You can use any paper as long as it's cut into a square) and some scissors and away we go!
1) Start with your square of paper, fold in half horizontally and vertically, crease well and unfold.
2) Fold diagonally, crease well and unfold.
3) Your paper should know look like this
4) Follow the creased lines and fold you paper like this
5) Press down and fold the closed side down by 1/2" creasing well
6) Unfold your paper and you will see the creases and the small square in the middle.
7) This next step I found a bit confusing as there is an order to folding the lines. Once you get that figured out it will become easier.
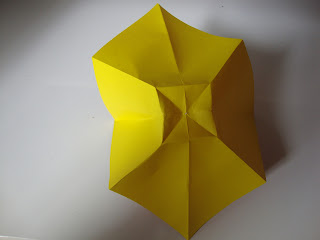
This is how the fold lines should look in order for it to fold into itself in the next step. You can see that the 4 corners are folded in "mountain folds" which means that they fold upwards like a mountain peak and the sides are folded in a "valley fold" so they crease inwards. This should allow it to fold up like so;
This is how it will look when it's been folded up.
8) Fold the corners down like this
9) Flip it over and fold again exactly the same way.
10) Open the paper keeping the folds in place.
It'll look like this
11) Turn the paper over and make sure it's placed the same as below. The lines marked in black are where you will make 4 cuts along the crease.
From the side you can see where to make the cut. This is the part I got wrong so many times as it wasn't clear exactly where I should have been cutting! I hope this demonstrates the correct way well enough!
Repeat this on all 4 corners as shown in the picture for step 11.
12) Fold down the top piece and then fold the corner edges as shown.
13) Flip the paper over and repeat on the bottom corners
14) Turn your bow over and tuck the pointed end into the middle of the bow.
15) Turn the bow back over and fold the left and right edges as shown and then made a cut up the middle.
16) Fold the middle cuts of the bow over as show below.
17) Turn back over and there you have your finished bow! You can either leave the bow tail as it is or you can cut it to make pointed ends.
Use to decorate cards, presents, pegs or just about anything you want!


