Salt dough Santa & gift tags tutorial

I've been trying to lay off the baking for a couple of days (You have to at least attempt to look like you're keeping an eye on fitting into your jeans right!) so have been looking at simple and easy craft ideas for Christmas. I forgot how 3 ingredients (that you usually always have floating around the house) can be turned into SO many things! Yep, i'm talking about that kids favorite SALT DOUGH! 

I'm going to show you how to make a Santa and some stars that can be used as gift tags or hung on the Christmas tree but you really can use salt dough to make anything from baskets to wreaths! Gingerbread men also look cute! Do let me know if you make something yourself, I would love to see!
1) Start by combining your ingredients in a large bowl and mix together until a dough is formed. If you find the mixture is a little bit too sticky, you can add more flour. Remove the dough from bowl and kneed on a flat surface for 5 minutes to smooth out any lumps. If you want to add colour to the dough (I used red & pink), divide into sections and kneed in food colouring. Allow your dough to sit for 20 minutes before using. Left over dough can also be wrapped in cling film and stored in the fridge for up to a week!

2) On a baking try, make Santa's face by shape an oval out of the dough roughly 1/4 inch thick. 

3) Hand roll a piece of dough into a rope 1/4 inch thick and long enough to fit around the head shape. To attach this piece and subsequent pieces use a little bit of water on the end of your finger and dampen the area you want to stick it to. 

4) Mould a hat shape and attach to the top of Santa's head.
5) Make a pom pom and a band for Santa's hat using the plain dough. Again, attach with a little water. 

6) Roll and flatten 2 small pink balls for cheeks and 2 small red balls for a nose and mouth.

7) Make a beard by rolling small sausage shaped pieces of dough between your fingers and layering up. Start along the the outside edge and worth upwards. Lastly make a little curled end mustache! 

8) Find yourself a hair pin.
9) Push the hair pin into your hat so the loop is at the top. This will be where you can thread some ribbon through to hang your Santa. 

10) Santa is finished! I scored in some eyes that I will go over with a black felt tip once he's dry but you can also just draw on 2 black dots. I'm in now rush so I am leaving him to dry at room temperature for 30-48 hours. To speed up the process you can bake in the oven at 50°C for 30 minutes and then increase to 100°C for 3-4 hours. Once fully set, turn the oven off and leave your items inside to cool down. You can also use a layer of clear varnish on your Santa for a glossy finish.

11) Using the leftover dough, I roughly kneaded the red & plain together to create a marbled effect. Using a rolling pin, roll the dough out to 1/4 inch thickness and using a cookie cutter, cut out start shapes. Make a hole in the top using the blunt end of a wooden kebab stick. 

12) Taking the pointed end of your kebab stick, make small dots around the edge of your star. These are great for hanging on the tree or for gift tags on your presents!

Pom pom tutorial & garland

Pom poms are so easy to make, and can be used for so many things, yet maybe you are like me and haven't made one since school? Here's a quick tutorial to refresh your memory!
1) You'll need:

1 piece of cardboard
A pair of SHARP scissors
A compass 

2) Use your compass to make a template by drawing 2 concentric circles on your piece of card. The size of the outside circle with determine the size of your finished pom pom. Mine is 2". Alternatively you can download and print out a template {here}

3) Cut a 2 meter length of wool. Hold your 2 templates together, back to back, and start wrapping your wool around. As and when you run of out wool, just cut off another length and keep on wrapping. This process can take a little while depending on the size of your pom pom so watch something on TV/Youtube or a film and get wrapping!

4) Once it becomes difficult to pass the wool through the hole you're done! You can completely close up the hole by threading a tapestry needled with your wool but I am far too lazy for that!
5) This is where having sharp scissors come into play, start to snip the wool on the outside edge until you have a little gap to put your scissors in between your 2 templates. Continue cutting all the way around. 

6) Cut another length of wool and insert it between your two templates, tie a couple of knots to hold the middle in place.

7) Remove the templates by either cutting them off or gently easing them off each end. 

8) There you have one finished, fluffy pom pom! If you have any little ends sticking out that are too long just snip them off and into shape. 

To make a garland: Make a bunch of pom poms and either tie together using the wool left from making your middle knot (see photo 8) or by threading a needle with wool and sewing pompoms onto the length of it!

More ideas for your pom poms here/here/here/here :-)

Spiced chai concentrate recipe

Over the summer my favorite drink at Starbucks quickly became the iced chai tea lattes and although when I go there over Christmas, I will always go for the gingerbread latte, I have been craving the slightly odd, slightly spicy, slightly sweet taste of the chai tea. I first purchased from Tesco, a box of Royal Chai sweetened mix but this turned out to pretty much just taste of cardamom and from that I worked out I absolutely do NOT like the taste of cardamom.  Chai FAIL -1.

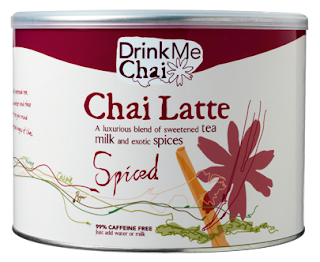
The second tub I purchased is Drink Me, Chai Latte (Spiced) and this stuff is seriously good! I prefer to have this hot and it's delicious! You can get this in all of the supermarkets and it comes in vanilla too. Chai WIN +1.


While I browsing Pinterest (Again! Yes I know, i'm never off that site!) I came across a recipe on A Wooden Nest to make your own spiced chai concentrate and, well... it would have been rude not to give it a go! I adapted this recipe to suit my taste (i.e. I didn't add any cardamom and only 1 star anise) but you can always refer back to the original with the link above.


You'll need: (To fill a 450ml bottle)


4 cups water
1 stick cinnamon
1 inch piece of fresh ginger, chopped
1 whole star anise pods
10 whole cloves
1/4 teaspoon freshly ground black pepper
1 teaspoon freshly ground nutmeg
1 teaspoon orange zest
10 bags of black tea
1/2 cup brown sugar
1 tablespoon honey
1 tablespoon vanilla extract


1) Measure out all of your spices and set them aside along with your tea bags.

2) Bring to the boil your 4 cups of water and take off the heat.

3) Add in all your spices & the tea bags and leave to infuse for 15 minutes.


4) Remove your tea bags and strain the mixture into a jug or large bowl. Add in your sugar, honey and vanilla and stir until dissolved. Pour mixture into a bottle or jar and keep in the fridge! I put my cinnamon stick in the bottle because I can't get enough of the stuff! Chai WIN +100.


To serve, mix one part concentrate with one part milk. Heat it up or serve it cold over ice! This should last in the fridge for a couple of weeks at least. 

Mmmmm. Starbucks who? 

Christmas Gift Ideas #1

Hi Guys!

I feel like I haven't blogged in forever and it's only been 2 days! It's almost 1am but I wanted to put a little something up before I go to sleep!

As I am a self confessed, serial "stuff" browser, I thought I might be able to put this 'skill' to good use but putting together a series of gift ideas. (Do let me know if you would like me to continue this!) Sometimes we all draw a blank on what to buy someone so I'm hoping you might get some ideas and inspiration whether it be for a friend or yourself! Also let me know if you would like me to put a price cap on the gift ideas, under £20 etc.


I also put my Christmas tree up tonight despite people telling me it was too early! It's only 5 days until the 1st so I think it's perfectly acceptable and you know what, it makes me happy so that's all that matters! I'll upload some photos tomorrow along with a new tutorial. (Finally!)

Hope you are all having a good weekend so far! I'm up early to do some Sunday shopping and lunch with the mumma, one of my favorite things!

HAPPY THANKS GIVING!

I want to wish all of my lovely blog readers in the US a very happy Thanks Giving! I hope you are all having an amazing day with family and friends.


I'm still working away on tutorials that I will upload over the weekend but I did receive my parcel from The Stateside Candy Co. and I can't tell you how excited I am to make some pulled pork rolls tomorrow using the recipe I found on Pinterest! That place is dangerous for serial eaters like myself! 


I use this website for buying my canned pumpkin and, if i'm really in the mood to treat myself, to buy Froot Loops cos I love em'!! They are however, £7.50 a box so I only get them once in a blue moon. I hear there is a Christmas variety of Cap'N Crunch! Why-o-why can't we have that in the UK! 

I also had to buy a bag of peppermint candies from there too as I couldn't find any for love nor money in our shops. How is that even possible? Do we really not manufacture or sell a round, red and white peppermint!? I haven't decided what to do with them yet, I might put them in a glass vase with a chunky church candle or I might glue them to a polystyrene cone and make a christmas tree ornament. I might even have enough mints for both!

Once again, HAPPY THANKS GIVING from both me & Sweep!

PS. Behind the bag of peppermints is a vintage tea towel that I got from ebay for 99p! I thought I might start collecting them but my wonderful best friend Sean seems to think this might be a step too far. Mwwahahah!! Someone fetch me a cat jumper!!! 

It's beginning to smell a lot like Christmas!

Yankee candles are my absolute favorite and the only ones I've found that actually can be smelt through the whole house. I especially love their seasonal collections and with Christmas fast approaching, I've started to stock up on some seasonal smells!


These are Yankee Candle wax tarts which you use in a burner. They can be picked up for as little as 50p each on ebay and the burners start from around £5.99. Each tart has an 8 hour burn time and I break mine in half and burn half at a time. I picked up Mistletoe & Fig, Spiced Pumpkin, Gingerbread, Cranberry Peppermint, Peppermint Swirls, North Pole, Cinnamon Roll and Peppermint Cocoa. They all smell so good!

I also ran out of my lemon tea sugar scrub so tested out a little batch of peppermint sugar scrub. I just chucked some white sugar, epsom salt, olive oil, honey, peppermint extract, vanilla extract and some pink food coloring in a bowl and mixed.


Over the next few days i'm going to put together some more Christmas craft tutorials so keep your eyes peeled! Hope everyone is having a good week so far! Can't wait for Kirstie's homemade Britain tonight! Whoop!

How to make cinnamon sugar almonds

After watching the gorgeous Lorraine's video on her favorite snacks, I was once again annoyed at the fact I can't get cinnamon almonds over here and of course, all I then wanted to eat was cinnamon almonds. Only one thing for it, make said cinnamon almonds but also cover them in sugar because... well, why the hell not?

I found a recipe on Pinterest from onecharmingparty.com and let me tell you, these almonds are SO frickin' good!! Quick, simple and easy to make, no faffin' around, leave to cool and try not to sit and eat them all in one go! 

Here's how to do it!

You'll need:

1 cup of sugar
3 cups of almonds
1/2 tablespoon of cinnamon
1/4 cup of water

1) In a large frying pan, add all your ingredients and stir continuously over a medium heat.


2) The sugar will eventually start to crystalize as a result of the stirring!


3) Once all the sugar has completely crystalized, remove from the heat and tip your almonds out onto a piece of baking paper.


4) Allow to cool completely before putting them in an air tight container! I chose to put mine in a jar.


Little haul and holiday granola recipe

On Saturday I did some shopping with my mum and I picked up a few things that made me stupidly happy!


TKMAXX is quite literally my absolute favorite shop EVER. Our local one has a great homeware section so I picked up a huge glass jar inspired by Ina Garten for £14.99. The candy cane bauble lights are currently what I have in there and these were also £14.99, a bit pricey but I loved them! Lastly I picked up a mercury glass effect candle holder for £5.99 and a glass preserve bottle, £1.99, for the chai latte syrup i'm going to make. Mum is still refusing to entertain me buying a glittery wooden nutcracker man but i'll crack her! See what I did there! Did you! Oh dear...


Next I stopped in good old Poundland and picked up some paper doilies for a craft project and they were selling magic snow powder so naturally, it would be criminal to leave without picking some up!

I also popped into a couple of charity shops as I end up getting a lot of cookbooks from there and picked up the M&S Gastropub cookbook for a bargain £2.50! The little vintage christmas market glass was totally useless but I had to have it! It cost a whopping 35p!

My last stop was Holland & Barrett as they were having a buy one, get one half price sale on their dried fruit and nuts. I was watching Barefoot Contessa make a cherry, almond and cinnamon granola so I thought I would have a go but adapt it slightly. It turned out perfectly and is REALLY tasty! I don't think this is going to last long in my house so I'll be making more shortly! Again, also a nice idea to jar up and give as a Christmas gift! Here's how you make it...

Holiday Granola

You'll need:

4 cups of rolled oats
1 cups of sweetened shredded coconut, chopped
1 cups of sliced almonds
1 cup of dried cranberries, chopped
1 cup of vegetable oil
1/2 cup maple syrup
1/3 cup brown sugar
1tsp ground cinnamon

1) Preheat your oven to 160° or gas mark 3

2) In a large bowl combine all your ingredients apart from the coconut and mix well.

3) Spread mixture onto a large baking tray


4) Bake in the oven for 20-25 minutes, stir every 5 minutes and add in the shredded coconut in the last 5 minutes of baking. You will need to keep an eye on your granola to ensure it doesn't burn.

5) Remove from the oven, allow to cool and store in an airtight container!

November giveaway WINNERS!!


So the time has arrived to announce the 4 lucky winners of my November giveaway! Each of you will be receiving a set of washi tape courtesy of www.washitapes.co.uk!

I put all your entries in a mug... (Yep i'm watching I'm a celebrity!!)


And then I picked 4 at random...

Congratulations Lauren, Pixie Polly, Katie & Tattered Florals!

The winners will be receiving an email in the next few minutes so I can get your addresses and send out yo prizes ya'll!!

Huge thank you to everyone who entered and an even bigger thank you to @washitapes for supplying such amazing prizes!

Super easy chocolate fudge

Yesterday I made fudge for the first time. Let me start by saying I always thought I didn't like fudge and the thought of eating it actually made me shudder! (Think of the souvenir boxes of fudge you'd buy at the seaside, all sugar tasting and a bit grainy.... cringe!)

Anyway, a lot of people DO like fudge so I thought I would test out a recipe as bags of homemade fudge make nice Christmas gifts. It turns out, not only is this recipe quick and super easy, but I also LOVE this fudge! It tastes SO good! The hardest part is stopping yourself from eating it all!

This recipe makes a great base and you can pretty much add in anything you like such as raisins, chopped nuts, marshmallows or why not add in some peppermint extract for a festive fudge! I added chopped nuts on the top of mine but I would say that 80% of them fall off. In my opinion, it would be much better to mix the nuts into the fudge mixture.


You'll need:

400g chocolate (I used 200g milk & 200g dark)
397g can of Carnation condensed milk
25g butter
100g icing sugar
Chopped nuts

1) Line an 8 inch square baking tin with grease proof paper making sure the baking paper covers the sides as well as the bottom of the tin.

2) Break up your chocolate into small pieces and put in a saucepan with the condensed milk and butter. Melt together on a low/medium heat stirring occasionally until everything is melted and your left with a silky mixture. You can also melt everything in a microwave in 20 second bursts, stirring each time until all melted) If you are adding peppermint flavoring, dried fruit or nuts, add them in now.

3) Remove your mixture from the heat and sieve in 100g of icing sugar and mix thoroughly.
Pour mixture into your lined baking tin and smooth over with a spoon. If you want to put nuts on top like I did, sprinkle them on now and press onto the surface.

4) Put in the refrigerator over night. I know that waiting is painful but the original recipe says chill for an hour and this isn't long enough. It wasn't set hard enough 3 hours later either but when I went to cut it up this morning it was P-E-R-F-E-C-T. Patience will be worth it I promise!

5) Remove your fudge from the tin and cut into squares!

6) Enjoy!

Buffalo chicken tacos: THE BEST EVER.

As you may know by now I am in love with Pinterest and the amount of beyond delicious recipes on there is out of this world. I especially love anything "American style" so when I found this recipe from http://www.mrsregueiro.com/ for buffalo chicken tacos I knew I was onto a winner. Me and my parents had this for dinner with some french fries and OMFG it was out of this world. A couple of hours later and i'm still thinking about it, it was THAT good! I was also pleased to find the Frank's buffalo sauce in Sainsbury's so no need to specially order it in! (Yes I really DO do that!)

Without further a do, here's the recipe. I amended mine slightly to serve 4 people but you can always refer back to the original.


You'll need:

4 large chicken breasts
1/2 teaspoon of paprika
Salt & pepper
1/2 cup of Franks buffalo wing sauce (If you can't find this, Nandos hot sauce works just as well and is available in all supermarkets!)
A knob of butter
Tortillas
Vegetable oil
Cucumber
Spring onions
Ranch dressing

1) In a large bowl combine your flour, salt, pepper and paprika and give it a stir.

2) Cut up your chicken into thin strips or cubes, however you prefer.

3) Put the chicken into the seasoned flour and mix well making sure you coat all the chicken.

4) In a large frying pan, heat up a couple of table spoons of vegetable oil.

5) Once the oil is hot, add your chicken and cook on a medium/high heat until the chicken is cooked and the outside has a golden coating. Tip the chicken out onto a plate covered in kitchen roll to remove excess oil.

6) In a saucepan add your buffalo wing sauce, a knob of butter and melt together.

7) Add the chicken to the sauce and stir so the crispy chicken is coated.

8) Pile chicken, sliced cucumber & spring onion onto one side of the tortilla and drizzle on some ranch dressing.

9) Fold the tortilla in half, serve with french fries and prepare to have a new favorite food!

SO. FRICKIN. GOOD.

I washed mine down with some Malibu & Cranberry IN A CAN! I think this is my new favorite thanks to the lovely Nicola who suggested I try it!


I've also made fudge for the first time tonight and it is currently setting in the fridge! I'll post a photo with the recipe if it's successful! I'm trying out a few things to see if I want to make them as Christmas gifts! X Factor time now! Hope you're all enjoying your weekend so far!

How to make: Shabby chic 3D cardboard stars

I came across a tutorial for these cardboard stars on the fantastic grey luster girl's blog and instantly knew the house needed to be decorated in an array of them! While I have only made white ones today, I am in the process of making a lot more for the mantel piece this Christmas! I'm thinking cranberry garland, fairy lights and silver stars!


You'll need:
  • Empty cereal box
  • Paint (Any colour you fancy!)
  • A felt tip pen in dark blue or black
  • Star templates 
  • Scissors
  • Paintbrush

Start by opening out your cereal box and then either print out or free hand draw a 5 pointed star in the size you require. I've used a star template I found {here} which I have cut out and then traced around onto my card.

Next you need to draw a line from the middle of each tip of each star across to the other side as show in the above photo. Open your scissor out and use the pointed end to score along the lines you have just drawn on.
Next, fold along your score lines to give the star it's 3D effect. A tip for this is to fold the line down the center of the point into a hill fold (outwards) and the lines either side of the middle line into a valley fold (inwards) this will make sense when you start to crease your lines.

Paint your stars in your desired colour and leave to dry. Don't worry if you can see the pen through the white paint, you want this to happen as it gives them a shabby chic feel! Afterwards I even went back over the lines with an old felt tip just to add even more definition. Once fully dry the card will become stiff and you are ready to place anywhere you like! Make a garland, add on a ribbon and I would love to see what you do with these if you make them! 

Have a great Friday, and don't forget you only have 2 days left to enter my washi tape giveaway!


Scandinavian style felt heart Christmas tree decoration

You'll need:

1 sheet of cream felt
Needle
Red & white thread (You can also use embroidery silk) 
Small beads
Heart template
Scissors
Small piece of ribbon
Make yourself a heart template with some cardboard and then cut out 2 squares of felt. Secure both layers of felt and the template together with a pin and cut around the heart.

Take one of the heart layers and thread a needle using the red cotton. To sew the stars, first sew a plus sign + and then sew on a smaller X across it. 
Sew as many of the stars into your heart as you like and then add on some of your chosen beads in random places. 

Once you have decorated the front to your satisfaction, put your 2 hearts together and with red thread, start sewing together using a blanket stitch. When you reach the middle of the heart, fold a piece of ribbon in half to make a loop, cover with the felt and continue to sew. If you are not sure how to do a blanket stitch, check out the video below!


Continue to stitch around your heart but leave a small gap to insert your filling giving the heart some dimension. Once you have padded out your heart, sew up the small gap and your done! 

PS. Don't forget to enter my washi tape contest which ends 20th November {HERE}

Take one tin can... diy makeup brush holder

I always like making something new from something that other wise would be thrown away and the humble tin can is just perfect for so many crafty projects! Tonight I wanted to make something quick and easy and, with just a tin can, a piece of felt and a length of ribbon you can make a handy pot to store your makeup brushes, pens or candy canes! The ways to decorate it are endless! I just grabbed what was close to hand!
{Click photo to enlarge}

Don't forget to enter my washi tape contest which ends Sunday 20th Novemeber {HERE}

Click! The daily swoon #12

Tree envy

A year back I spent a second Christmas up in the Lake District with one of my best friends Elizabeth (aka Dude) while she was house sitting for her parents. They literally live right on the edge of lake Ullswater and it is absolutely, breathtakingly beautiful. We woke up every day and looked out on this...

Elizabeths mum (Lady Judith as I like to call her) always 'does' the holidays so well, quite uncharacteristically so for us Brits! She will go all out for Halloween and Christmas is no exception. In the kitchen, I fell in love with her white Christmas tree that was covered in red chilli pepper lights and decocted with foodie goodness like candy canes, cupcakes and chocolate bars! Naturally, I want to recreate this at home but do you think I can find these kinds of ornaments? Nope. <Insert angry face here> !!!


I have been searching the web desperately trying to find some but anything remotely similar in the UK can cost a staggering £15 for ONE ornament or the shipping from US sites would just plain bankrupt you. I have been watching haul videos by the lovely sparklyblonde1 and lusting over all the amazing items she has been buying just reaffirming that I need to move to America!
All these ornaments are available in the US from Sur la table

If anyone knows where you can get these types of glass blow decorations in the UK please do let me know! I'm also thinking it might be a nice idea to do a decoration swap if anyone is interested? It could be shop bought or handmade but would be nice to add to your tree. Do let me know in the comments if you would like me to organise this!
Finally I will leave you with a photo of Lady J's Emma Bridgewater filled dresser. Yet another thing I now want to collect! I am turning into quite the magpie, I will end up on an episode of hoarders! 

Have a lovely day and remember to enter my CONTEST if you haven't already done so!

Blog Archive