I've gotta admit, since I did my first Christmas page for my Project Life album, it's taken me until now to even look at it again. I've banned myself from looking at other peoples pages on Pinterest because I end up getting annoyed by how perfect they are, and the thing about Project Life is, it really doesn't matter how perfect it is. If you like everything in the same colours, do it. If you like a whole rainbow going on, do it, thats the beauty of it being YOUR book of memories!

I'm gradually getting a nice little pile of papers and embellishments to pick from and i'm loving the January kits from work! This is probably why I want my page to look like it threw up with embellishment excitement!
Just a little note here, if you are new to scrapbooking & Project Life, you can buy monthly kits where paper treats drop through your letter box! For example, Sarah offers a 12 x 12 main kit, Documented 365 kit (which is Project Life size) and an add on kit with extra papers and embellishments.
Each month you receive a selection of papers, various embellishments, snip and stick sheets and stamps. I'm loving the cork dots, chipboard frames and the platinum ink pad in last months kit. As I also work for Sarah, I get a sneak peak at future kit designs and there's one coming up I can't wait to get my hands on!
If you'd like more info on the monthly kits, do pop over to Sarah's website HERE.

I am still in LOVE with my Canon Selphy printer. Actually LOVE LOVE LOVE it.
If anyones been on the fence about buying one, I thought showing you how super easy to use it is might sway you! Call me an enabler, I don't mind, photo printing excitement is now my thing!
To print my photos to the size I want, I use the PicFrame app which is free from the Apple App Store. In the top right hand corner you can change the photo size, so for Project Life I use either 4:3 or 3:4 unless I want small squares or a combination of smaller photos.
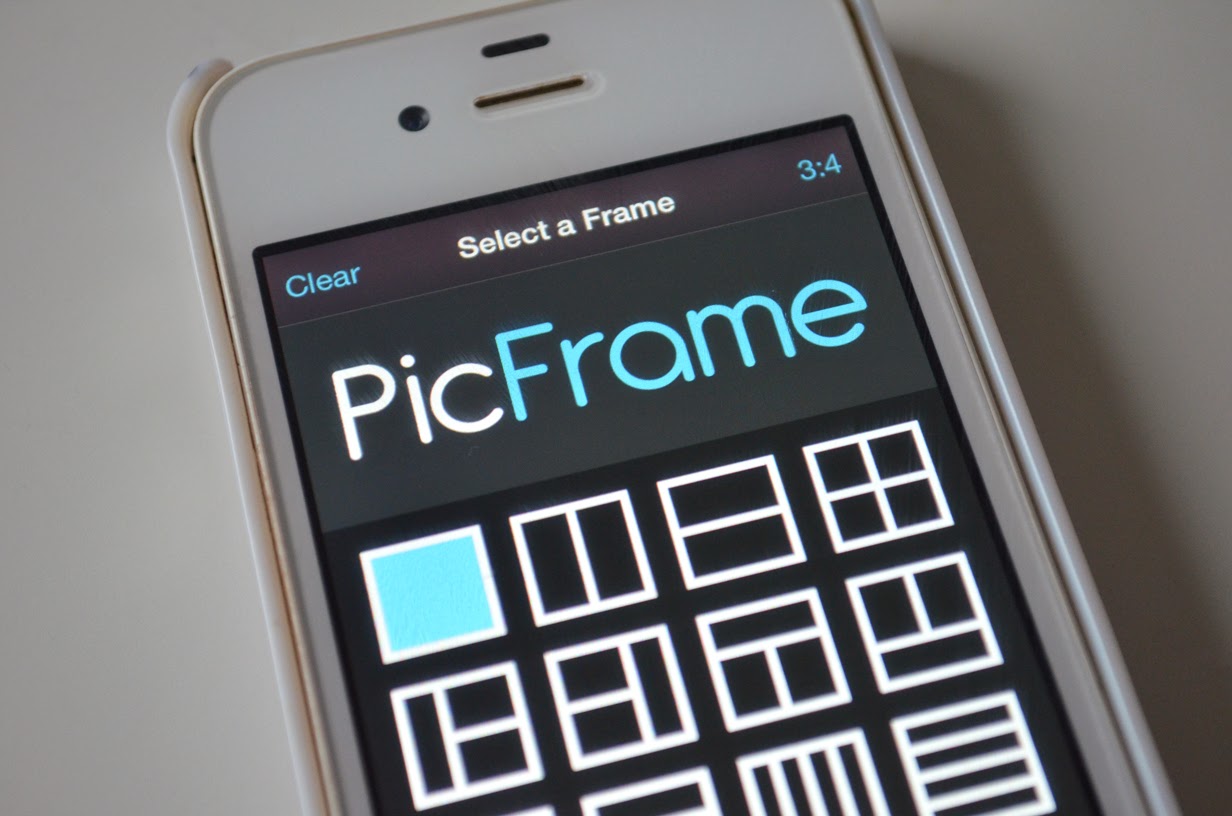
Once you select your size, for example 3:4 is what I needed, you just pick a photo from your camera roll and shift it around or zoom in until it looks how you want. Just hit the share button on the bottom right and select 'save to camera roll'.

When you buy a Canon Selphy you can have both a desktop based app for printing/editing your photos or you can download the free Canon iEPP app from the App Store.

Once you open the app you can select the picture you want to print from your camera roll. I selected a borderless print for this photo.

Press PRINT!

The printer prints in 4 layers, red, yellow, blue and then a clear top coat. It prints super fast and I pick up the photo instantly, no need to let it dry or anything!

I'm not gonna lie, I like sitting and watching it print. I lead a thrilling life right?!

This is how the finished print looks! There's a perforated piece at the top and bottom of the photo which just snaps off to leave you with a perfect 3:4 print.

If you choose to add a border to your photo from the Cannon iEPP app, this is how it prints and then you can just trim the excess from the top and bottom of the photo.


Anyone tempted by the Canon Selphy now? .......*gives knowing nod*
0 comments:
Post a Comment